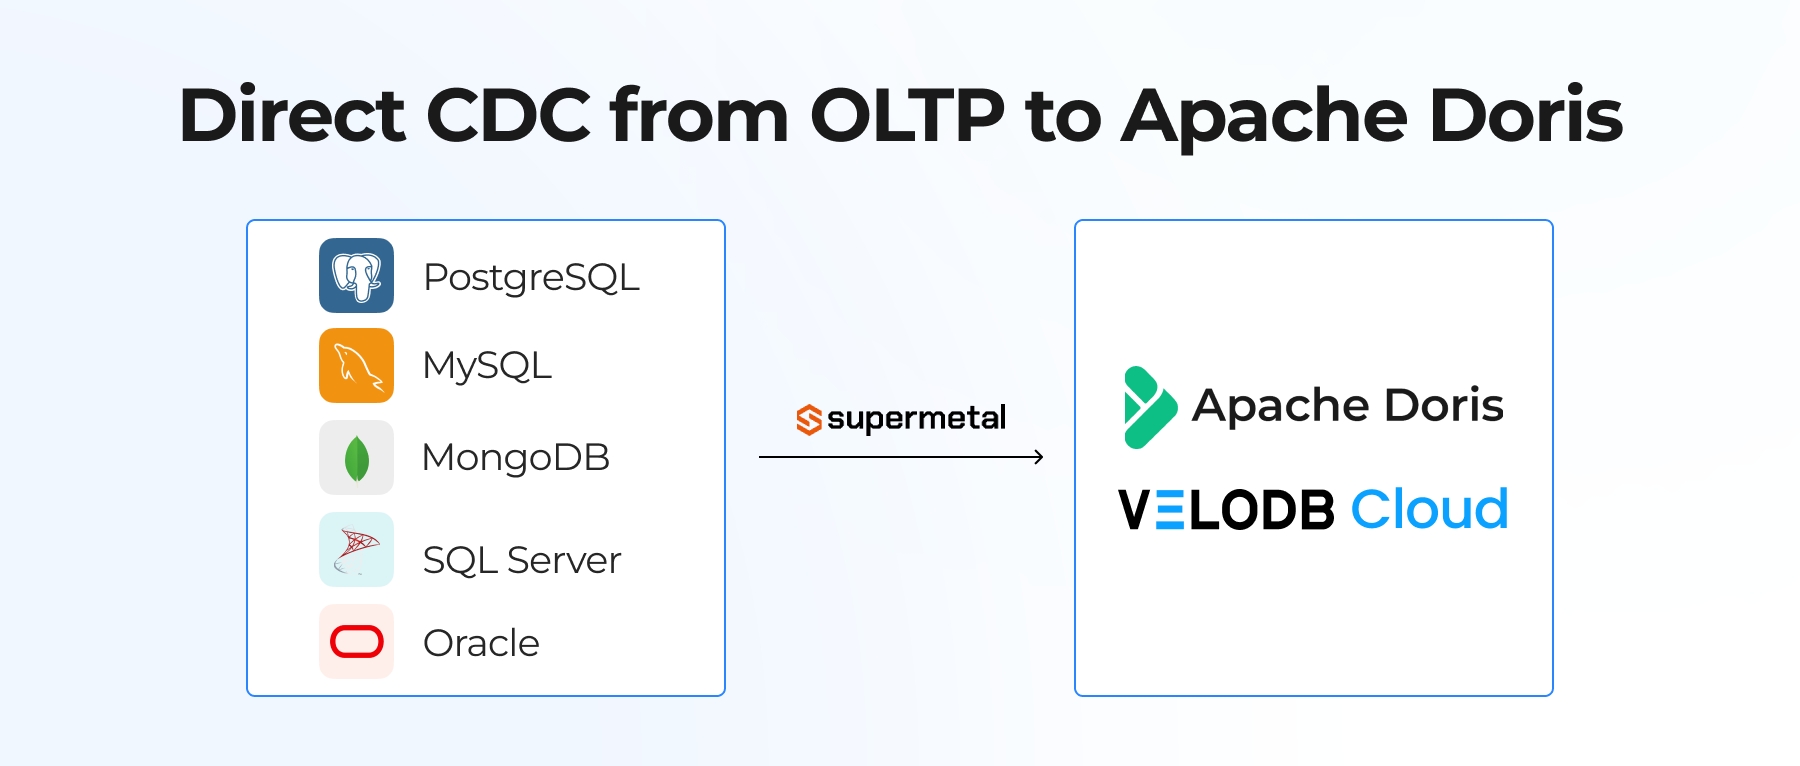

Building real-time analytics on top of live transactional databases (OLTP) can be a real headache. Traditionally, this means piecing together complex Change Data Capture (CDC) pipelines, deploying Debezium, managing Kafka queues, and writing Flink jobs. It's heavy, fragile, and requires constant maintenance.
VeloDB Cloud's new Data Import feature eliminates this complexity. We now support direct, zero-code data import and real-time synchronization from PostgreSQL and MySQL. Through a simple web UI, you can connect your transactional databases to VeloDB Cloud and build a modern HTAP architecture in minutes.
For a detailed technical walkthrough of the PostgreSQL CDC configuration, including WAL settings, replication slot setup, and permission requirements, please refer to our documentation on PostgreSQL CDC.
Why Choose VeloDB Cloud for Database Import?
1. Full + Incremental Sync, Zero Middleware
VeloDB Cloud natively integrates with PostgreSQL's WAL (Write-Ahead Logging) and MySQL's Binlog. It automatically pulls a full historical snapshot, then transitions to real-time incremental sync. You get second-level data freshness without managing any external CDC middleware.
2. Visual Management, No Black Boxes
You configure and manage the entire CDC pipeline through VeloDB Cloud's UI. From connection setup to table mapping, you won't need command-line scripts or JSON configs. Sync progress and status stay visible throughout.
3. Precise Data Control at the Column Level
Don't need to sync the entire database? No problem. You can selectively migrate specific schemas and tables. VeloDB Cloud also supports column-level filtering, so you can exclude sensitive PII fields (like passwords or emails) before the data ever leaves your source database.
4. Intelligent Pre-checks for Guaranteed Success
Before starting any job, VeloDB Cloud automatically runs a comprehensive environment checklist. It verifies network connectivity, WAL/Binlog configurations, and database permissions, ensuring your import job works perfectly on the first try.
Step-by-Step Guide: Import PG/MySQL to VeloDB Cloud
With those capabilities in place, setting up your first import takes just a few minutes. Here's how the workflow looks:
Step 1: Create Task & Connect Source
Click on the "Import" module under the Data section in VeloDB Cloud.
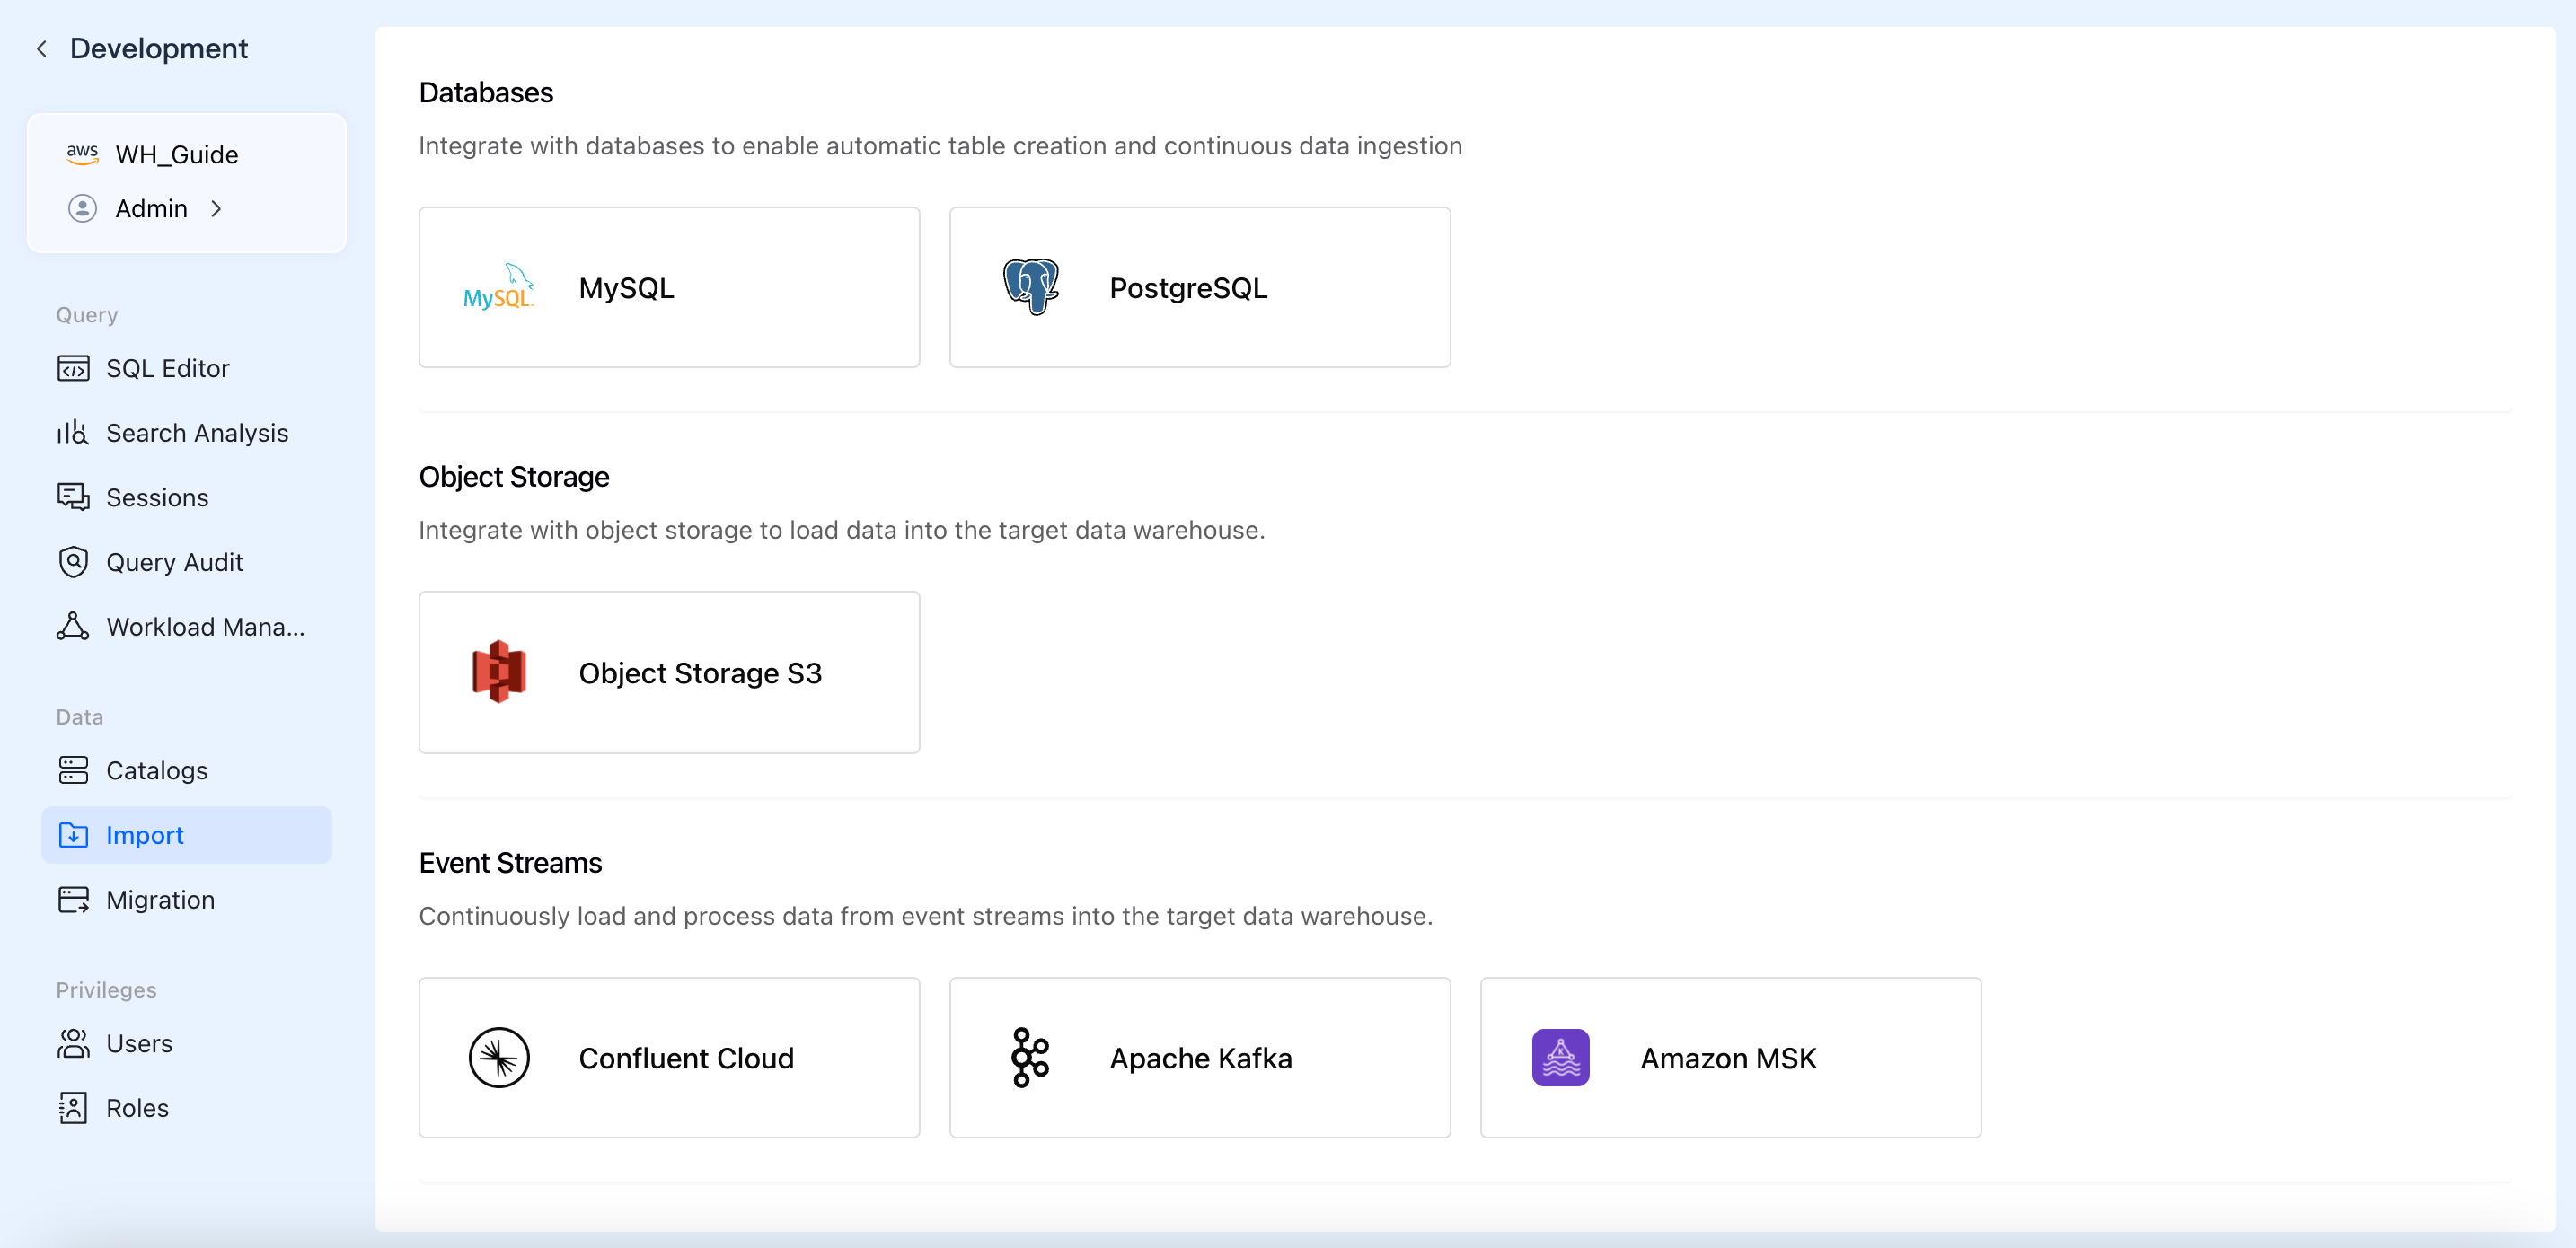
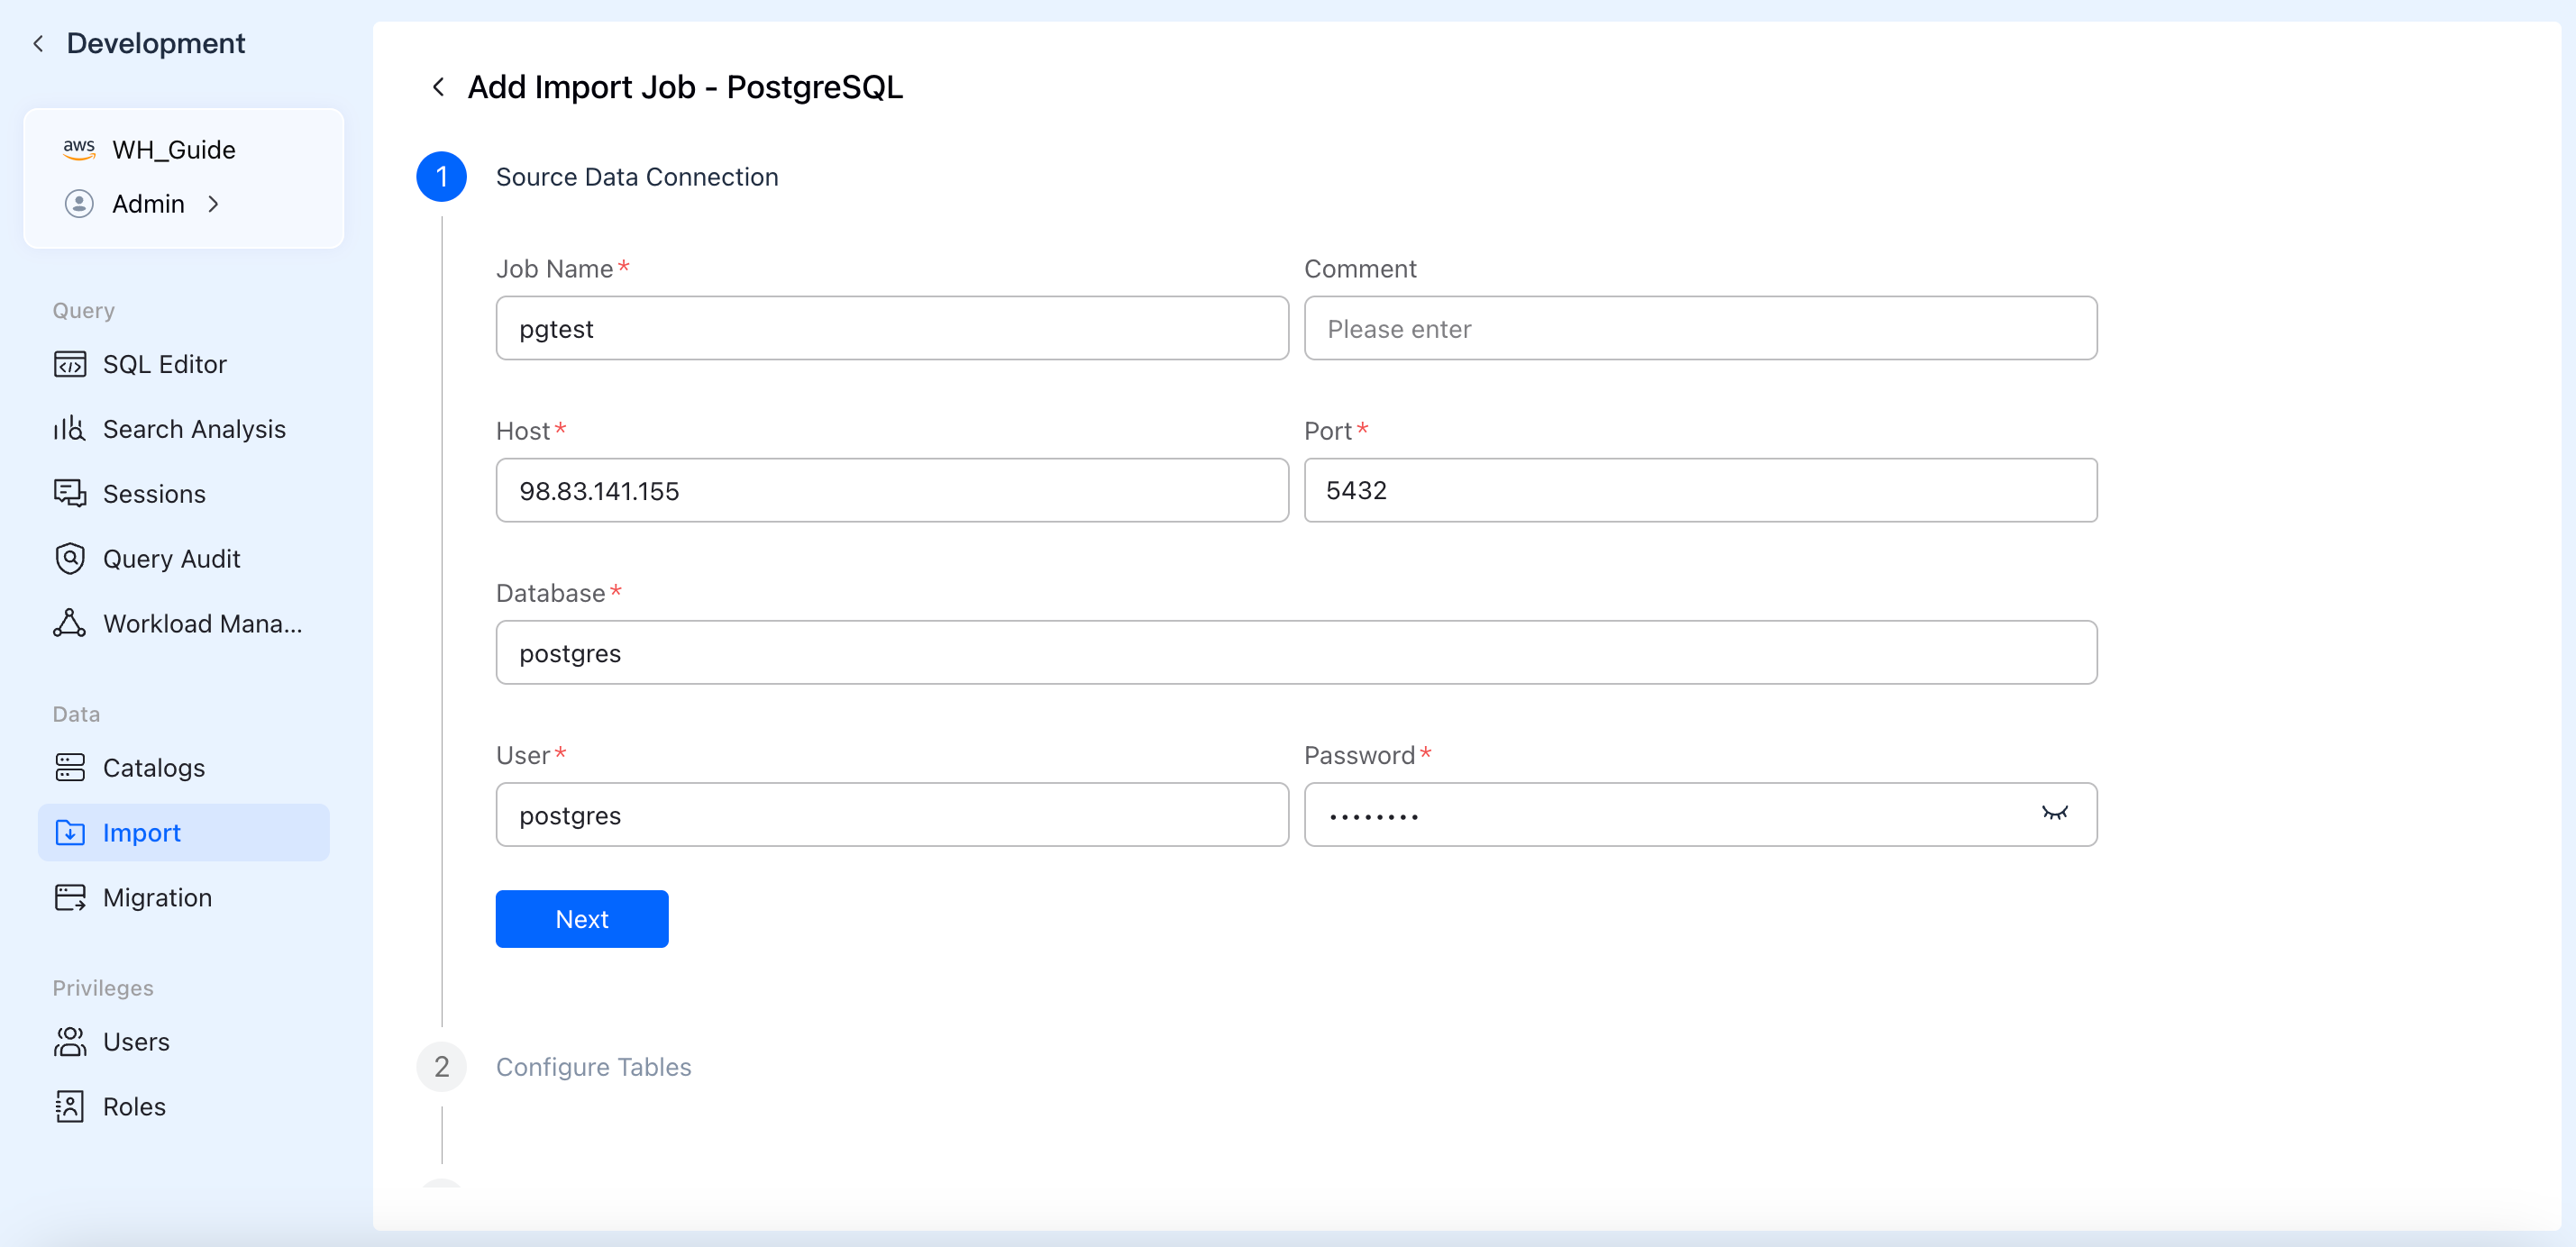
Select PostgreSQL or MySQL as your data source. Fill in your database connection details (Host, Port, Database Name, Username, and Password).
Step 2: Choose Your Sync Mode
Select how you want to ingest your data. You can choose "Full + Incremental" to load all historical data and continuously listen for future updates, or choose "Incremental" if you only want to capture new changes from this moment forward.
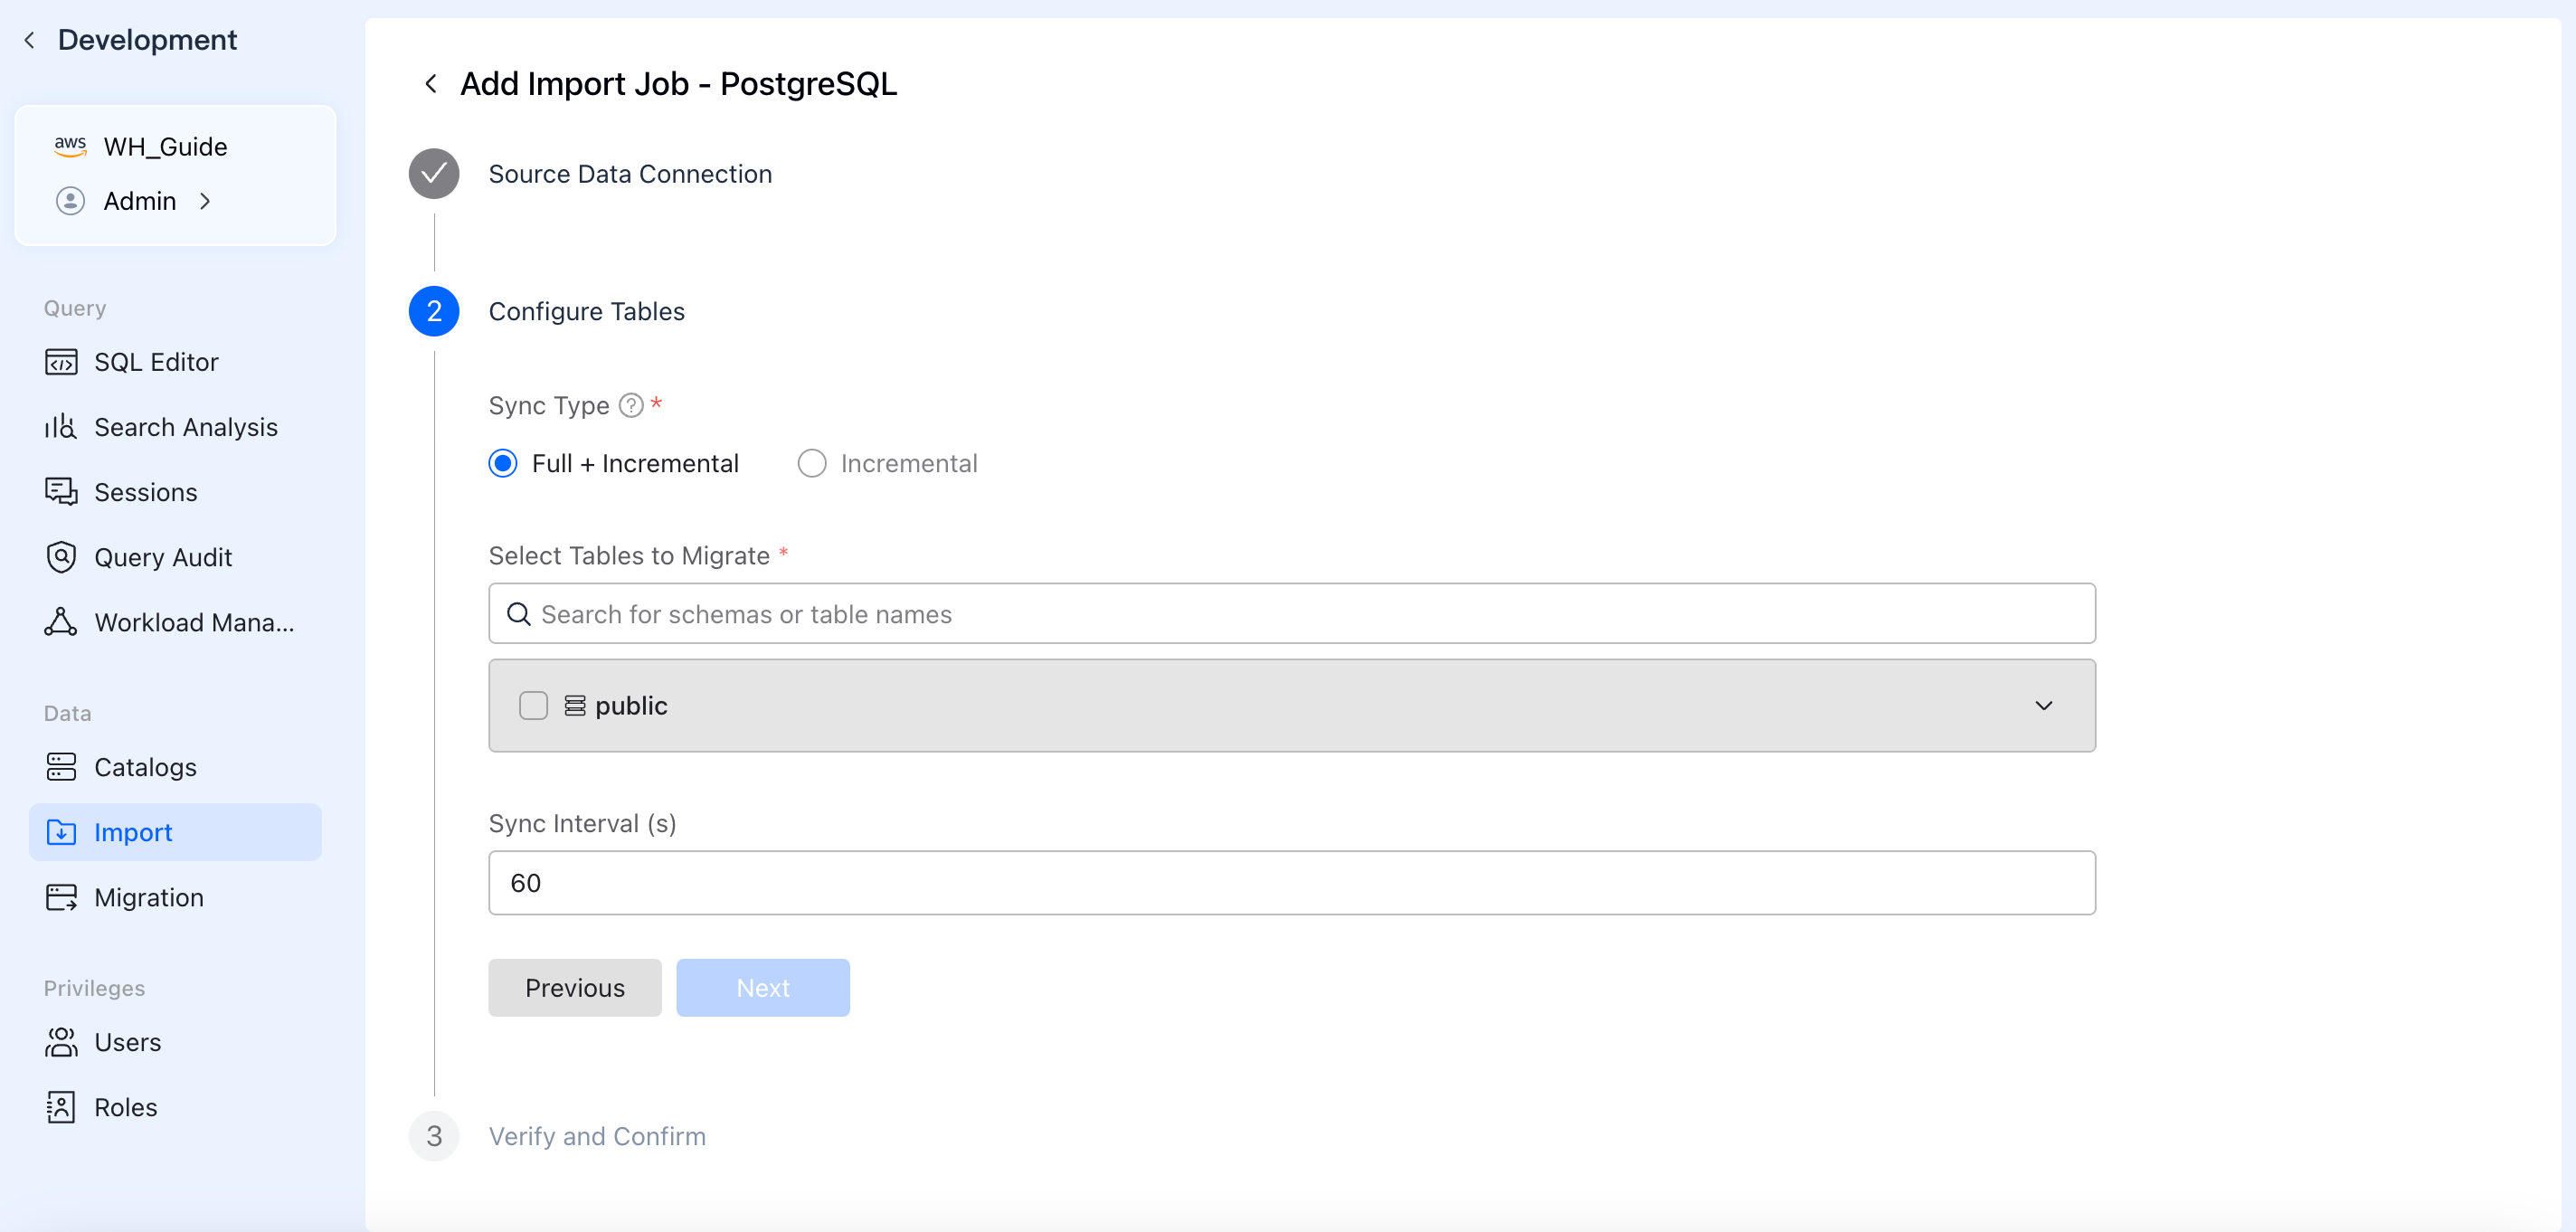
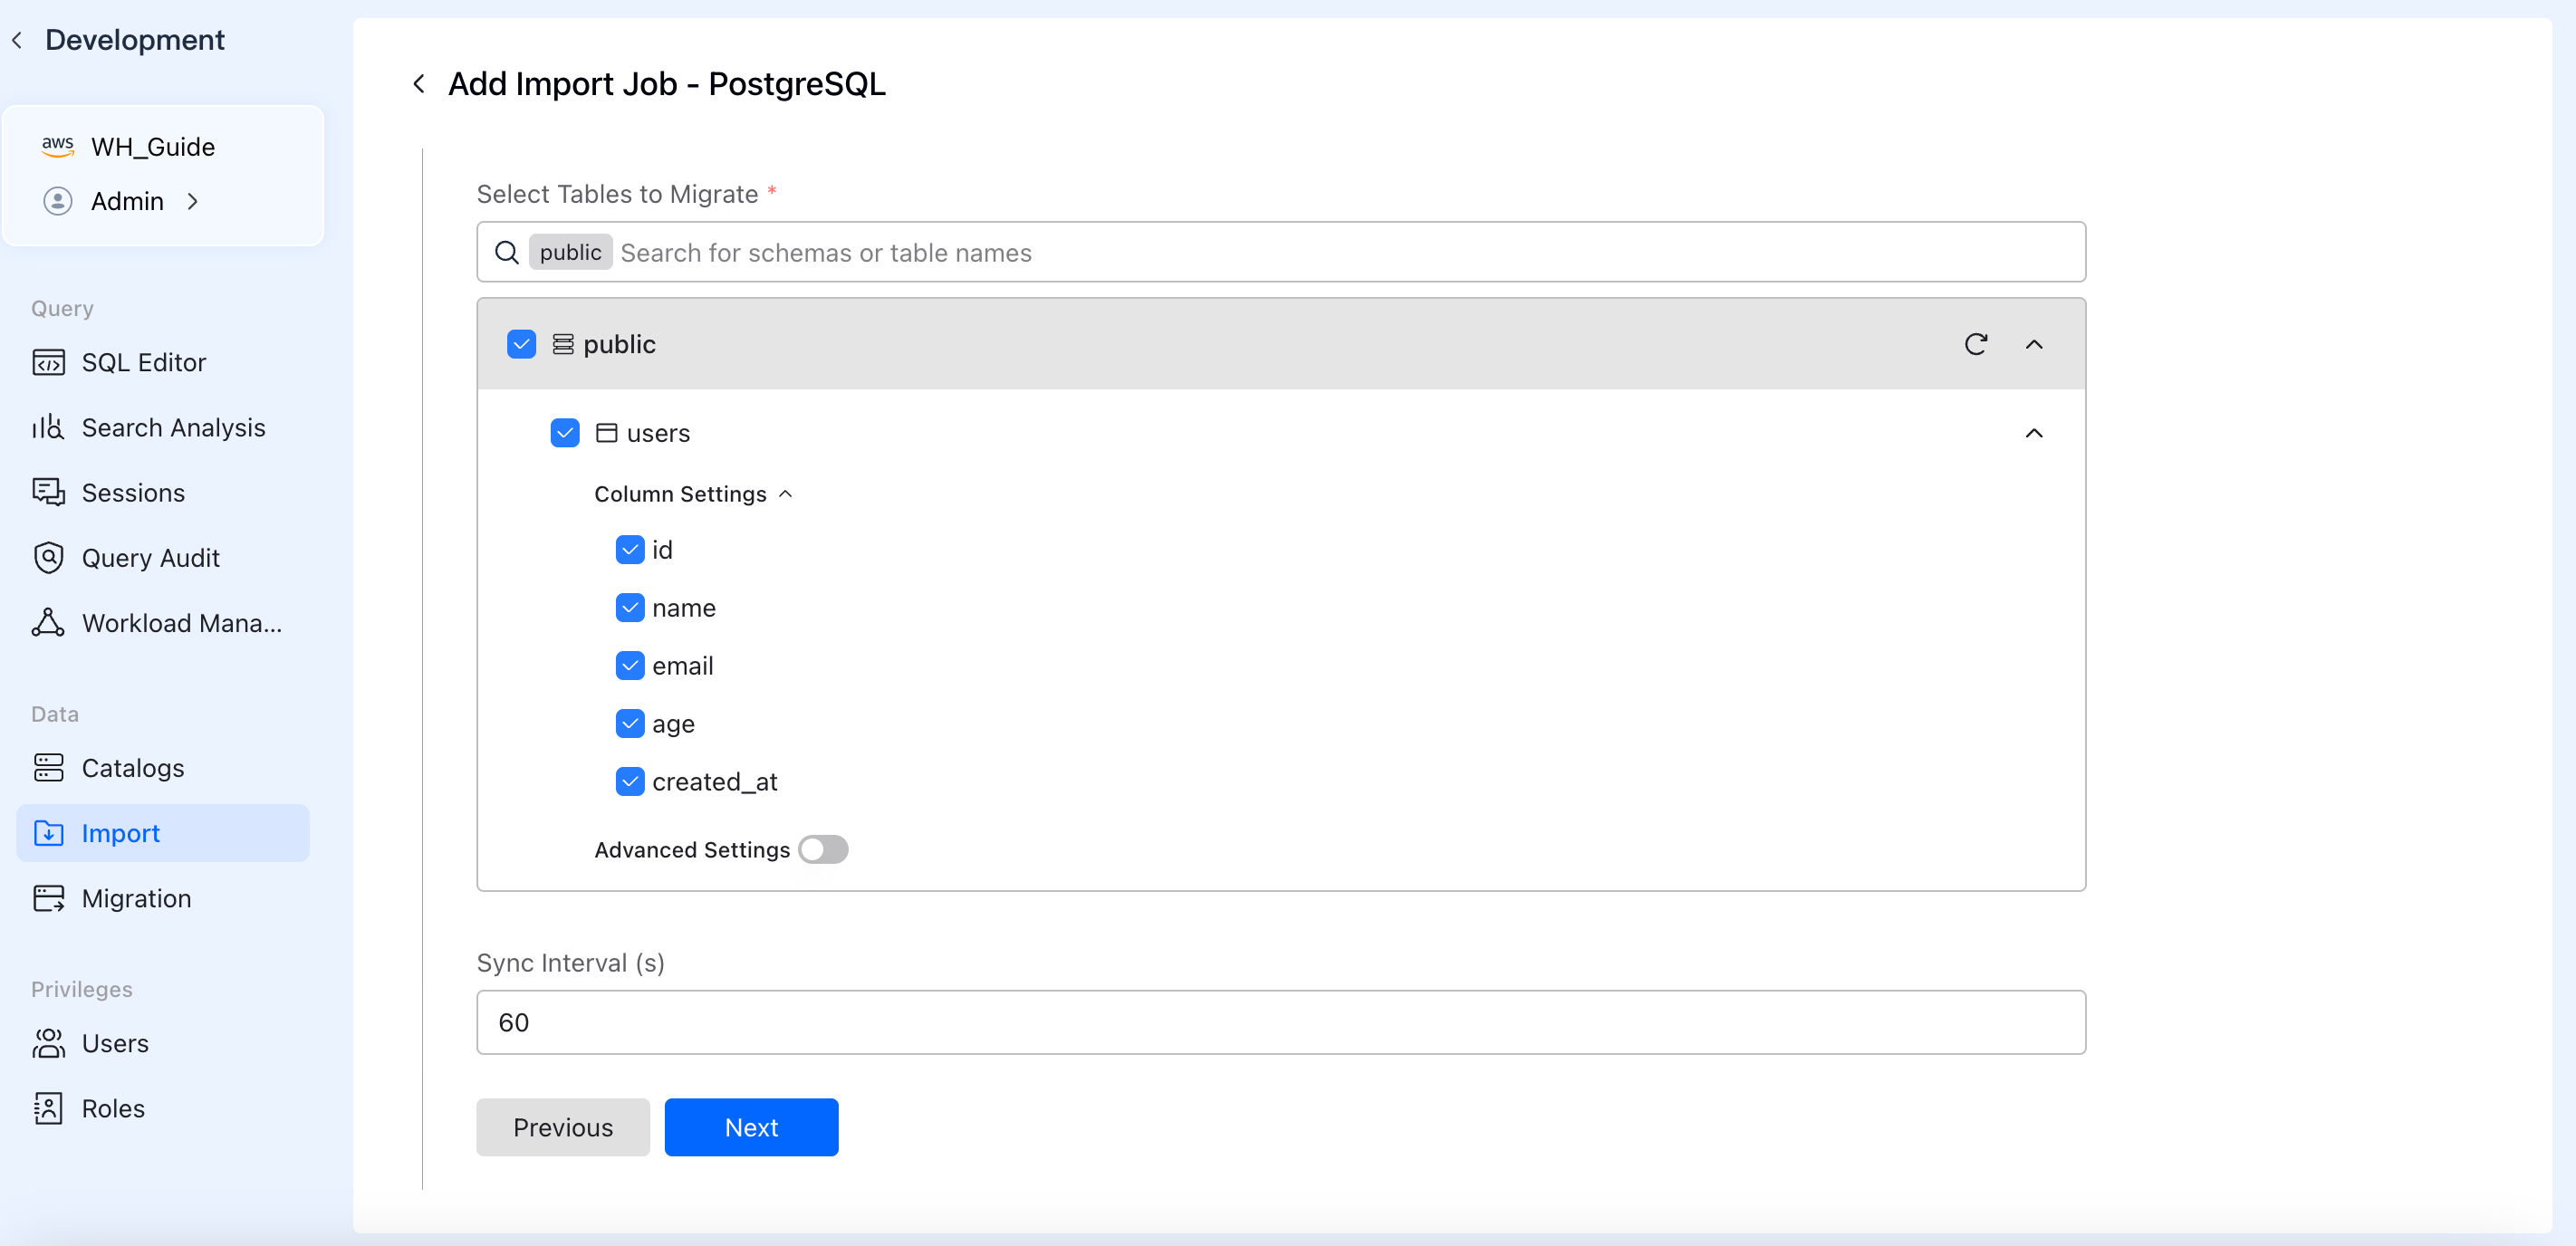
Step 3: Precise Table & Column Selection
Select only what you need. Use the dropdown to pick specific schemas (e.g., public) and check the exact tables to migrate. Expand "Column Settings" to exclude fields you don't need for analytics.
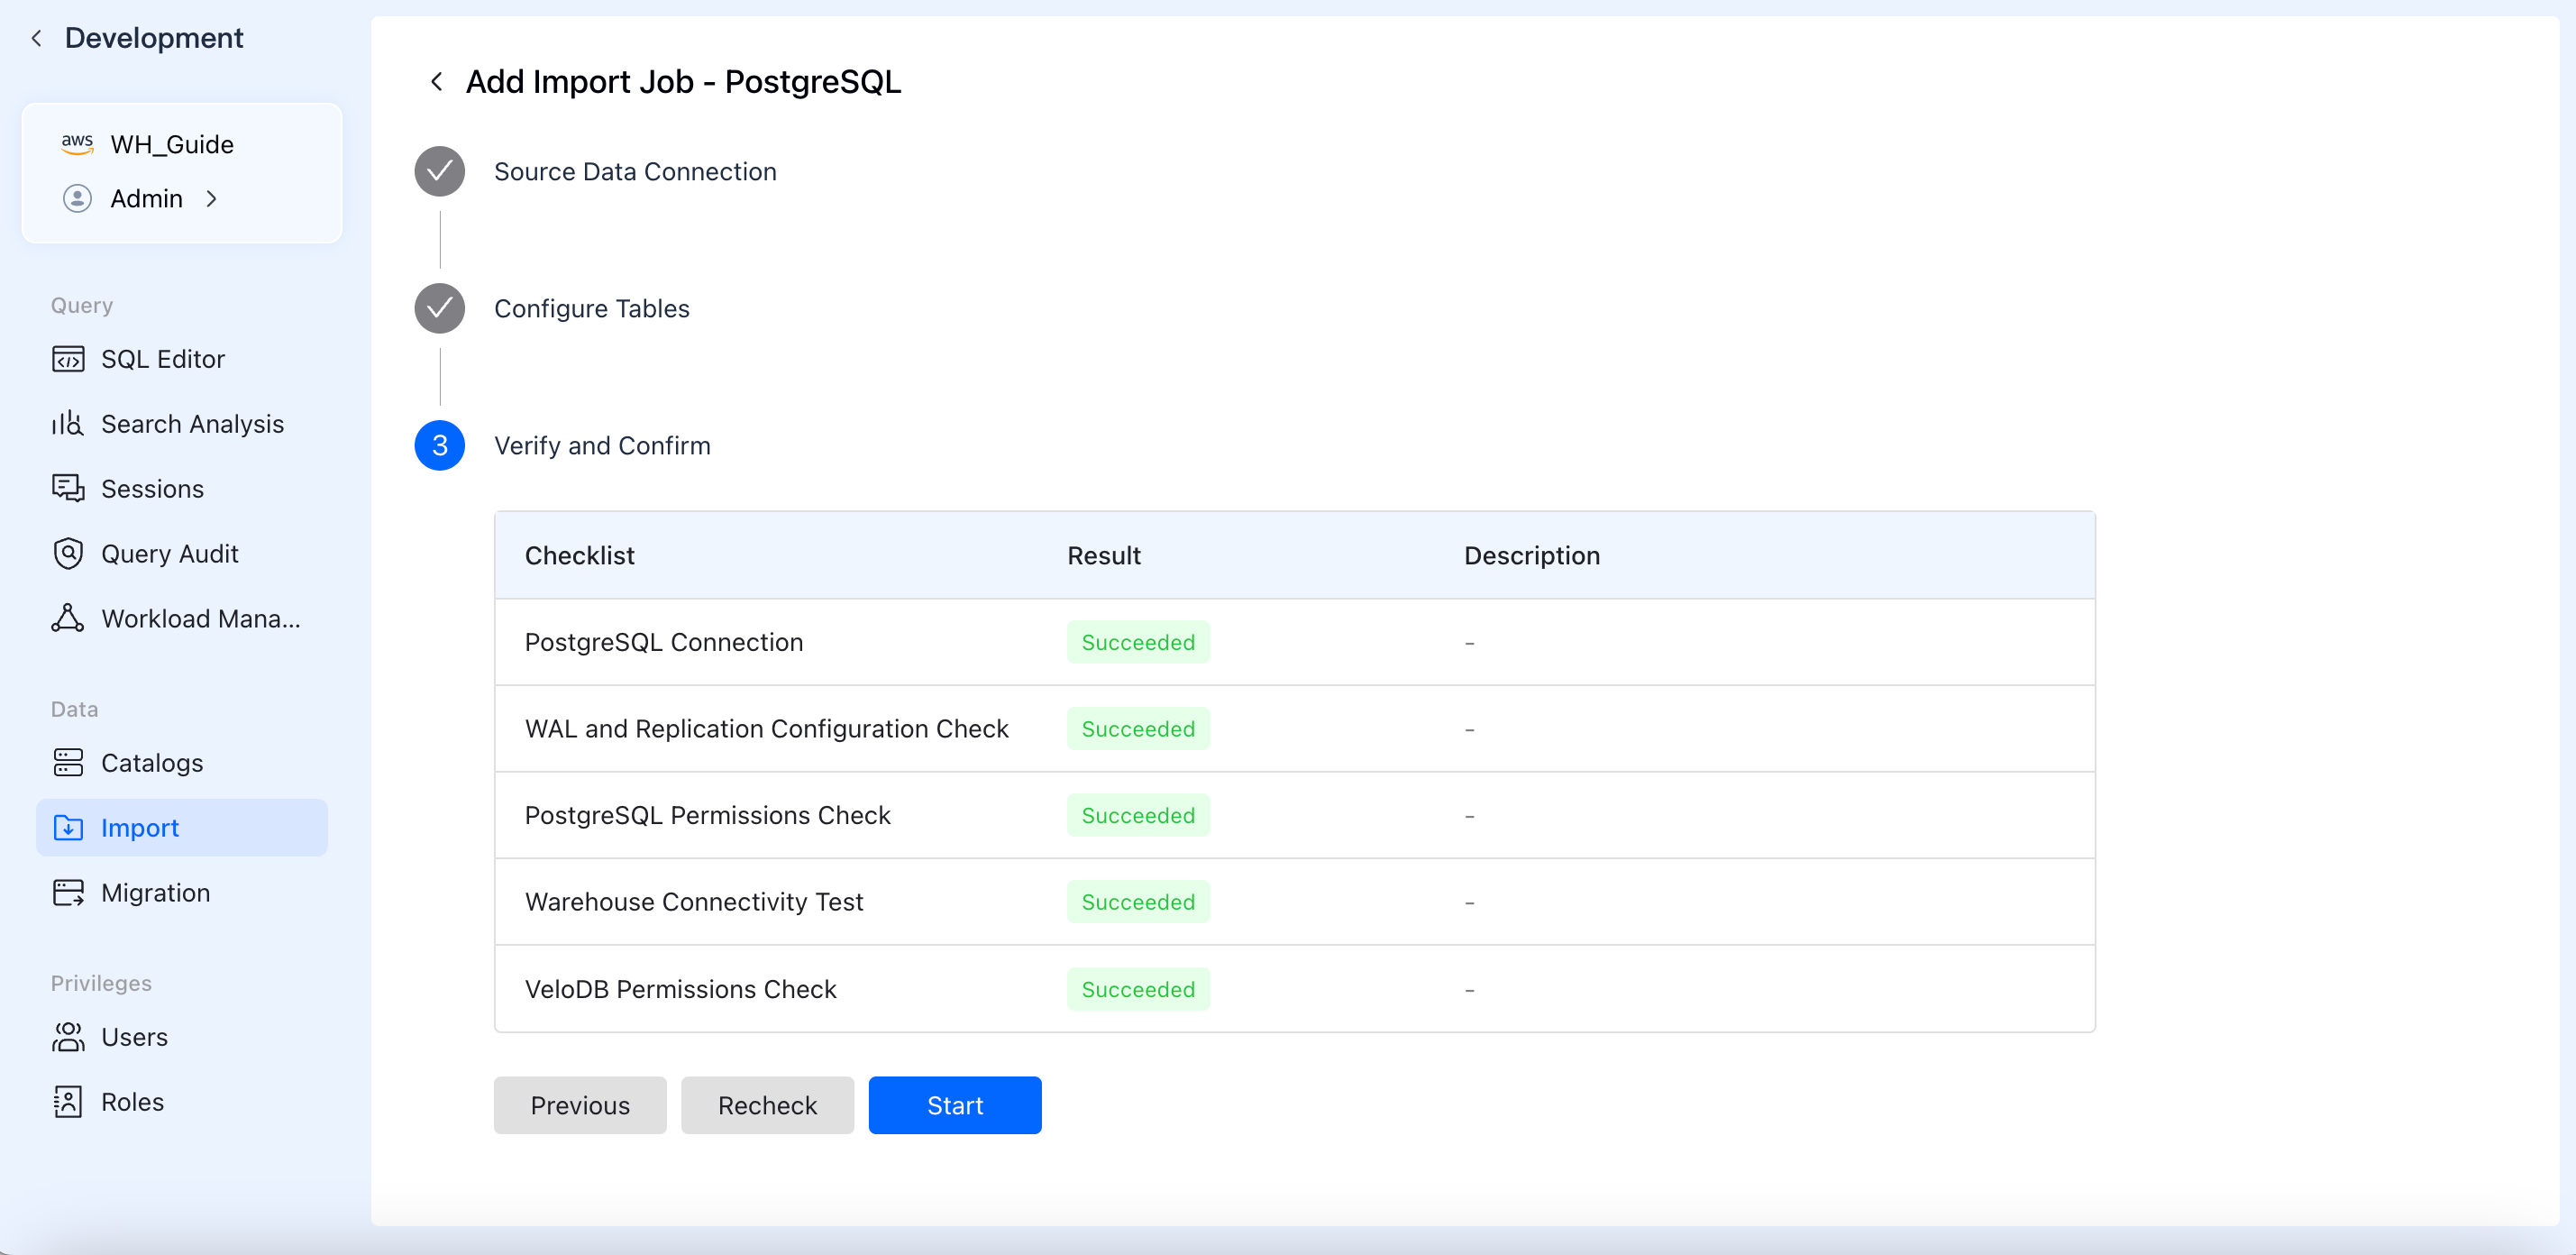
Step 4: Pre-check & Launch
Before you launch, VeloDB Cloud runs a pre-check to verify your configuration: PostgreSQL connection, WAL and replication settings, and database permissions. Once every item shows a green "Succeeded", click Start and let VeloDB Cloud handle the rest.
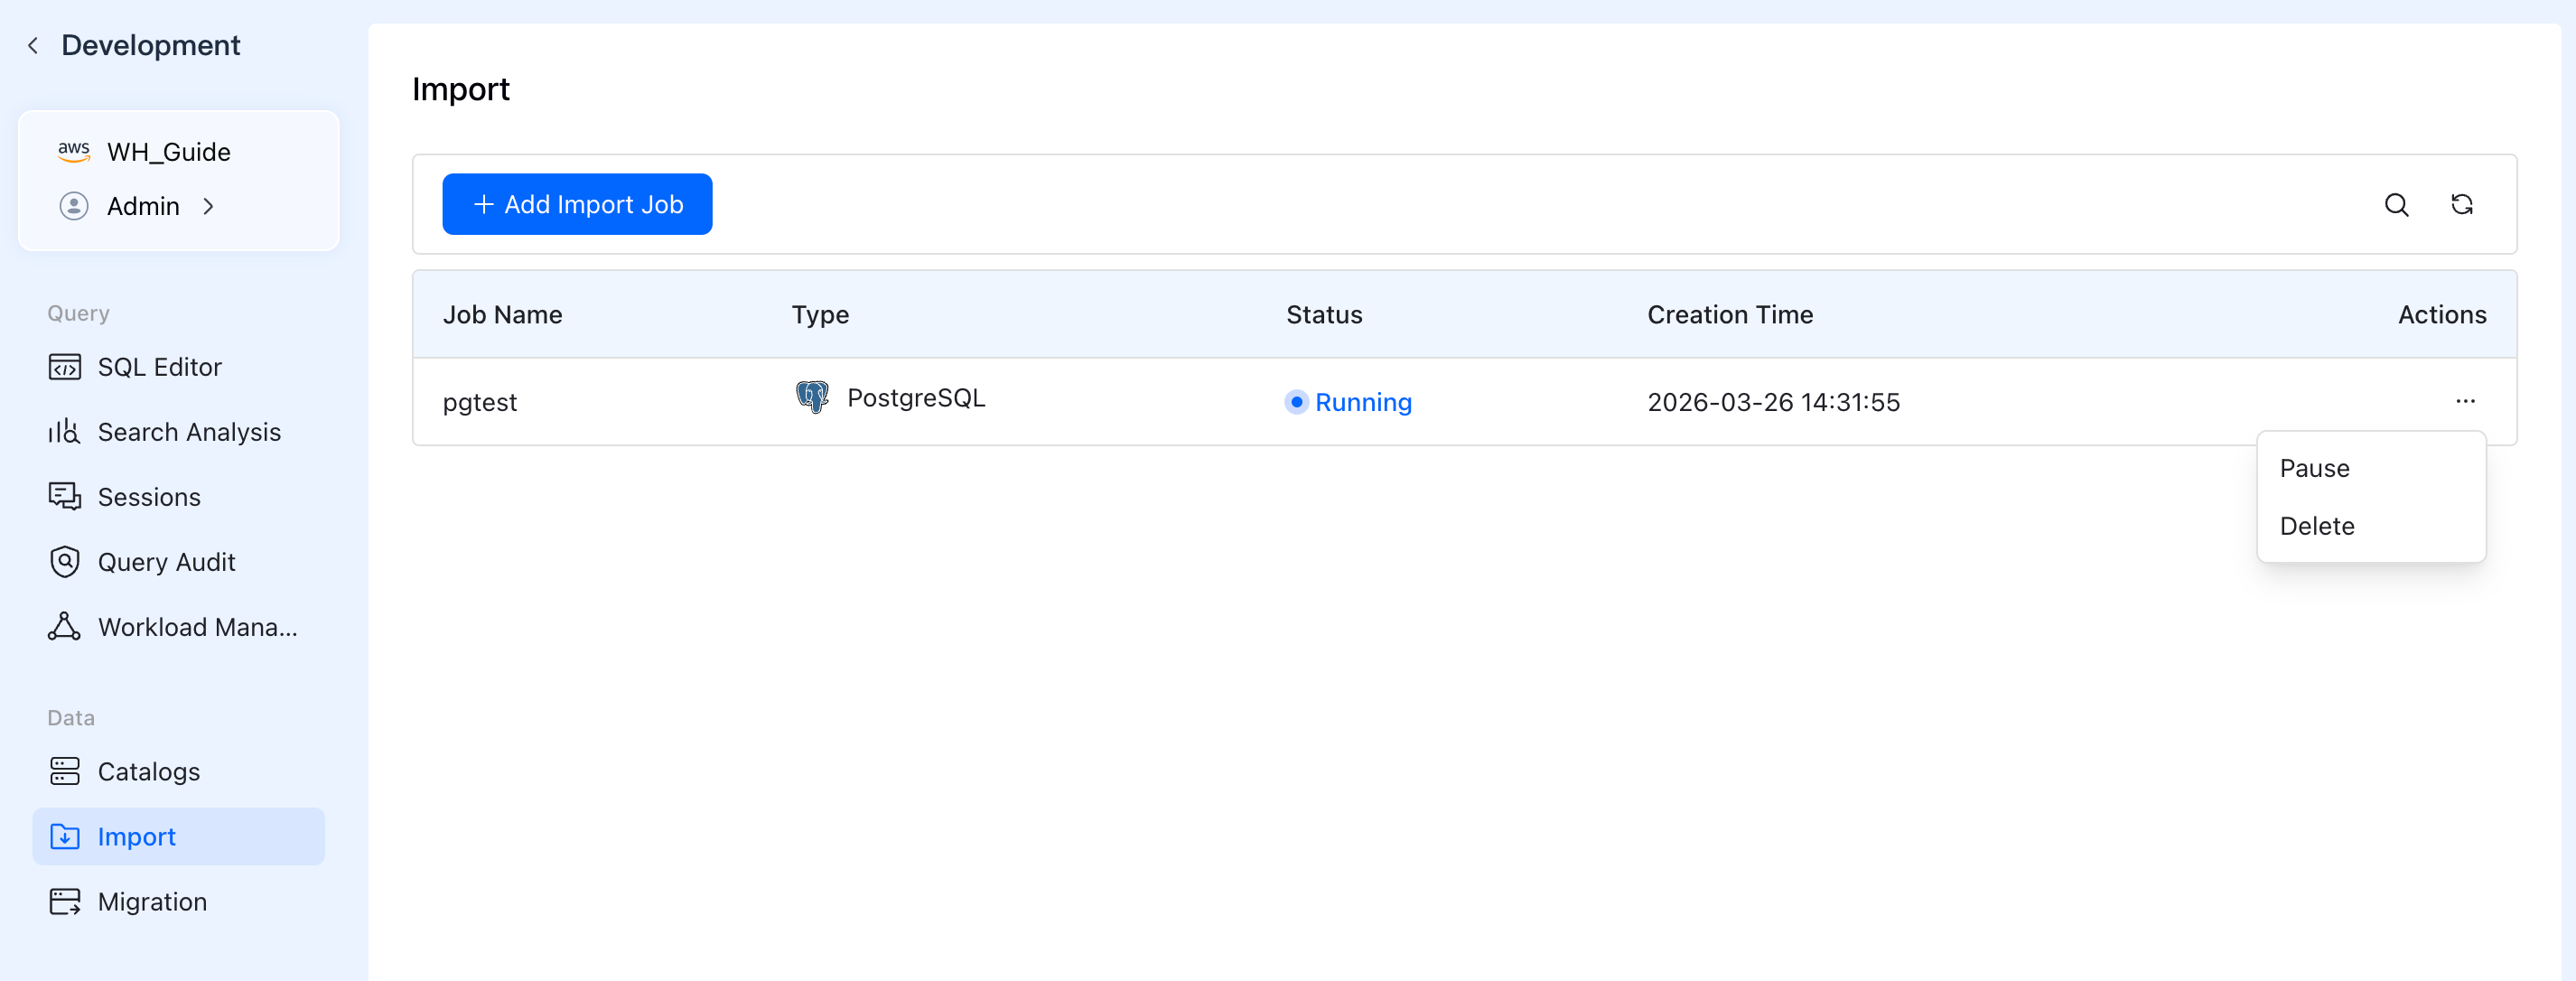
Step 5: Total Control & Monitoring
Once the task starts, you can monitor its real-time status (e.g., Running) in the Import Job list. You stay in control: use the "Actions" menu to Pause or Delete the sync job whenever your business requirements change.
Conclusion
Integrating transactional data into a real-time data warehouse shouldn't require an army of data engineers. VeloDB Cloud is built to make this step straightforward: connect your PostgreSQL or MySQL database, configure your sync preferences visually, and let us handle the real-time data flow.
Stop wrestling with CDC pipelines and start delivering analytical insights. Try VeloDB Cloud Today.