
Moving historical data to a new data warehouse can be a real headache. You're dealing with large volumes, live systems you can't take down, and no tolerance for data loss or inconsistency along the way.
VeloDB Cloud's One-Stop Data Migration feature covers the full migration path. Whether you are currently using Apache Doris, VeloDB, or StarRocks, the feature helps you seamlessly migrate your full data to VeloDB Cloud through a web UI without manual scripting.
Why Choose VeloDB Cloud Migration?
1. Multi-Source Support, Seamless Integration
VeloDB Cloud supports migration from Apache Doris and StarRocks, not just other VeloDB instances. The data model compatibility means you connect directly without format conversion in the middle.
2. Visualized Management, No Black Boxes
The entire migration process runs through a web UI: connection configuration, table selection, and concurrency settings. No command-line scripts required. Progress is visible throughout.
3. Secure, Efficient, and Auto-Cleaning
The migration process utilizes Object Storage as a temporary transit hub, ensuring high throughput and stability during transfer. Once the migration is complete, the system automatically cleans up the temporary data, securing your information without requiring manual storage maintenance.
4. Flexible Tuning for Optimal Performance
Table Concurrency and Tablet Concurrency are both configurable, so you can fine-tune the migration process based on the actual load of your source and destination clusters. Tune it down during peak hours, push it harder when capacity is available.
Step-by-Step Guide: Migrate Your Data to VeloDB Cloud
VeloDB Cloud offers a simple five-step workflow for data migration:
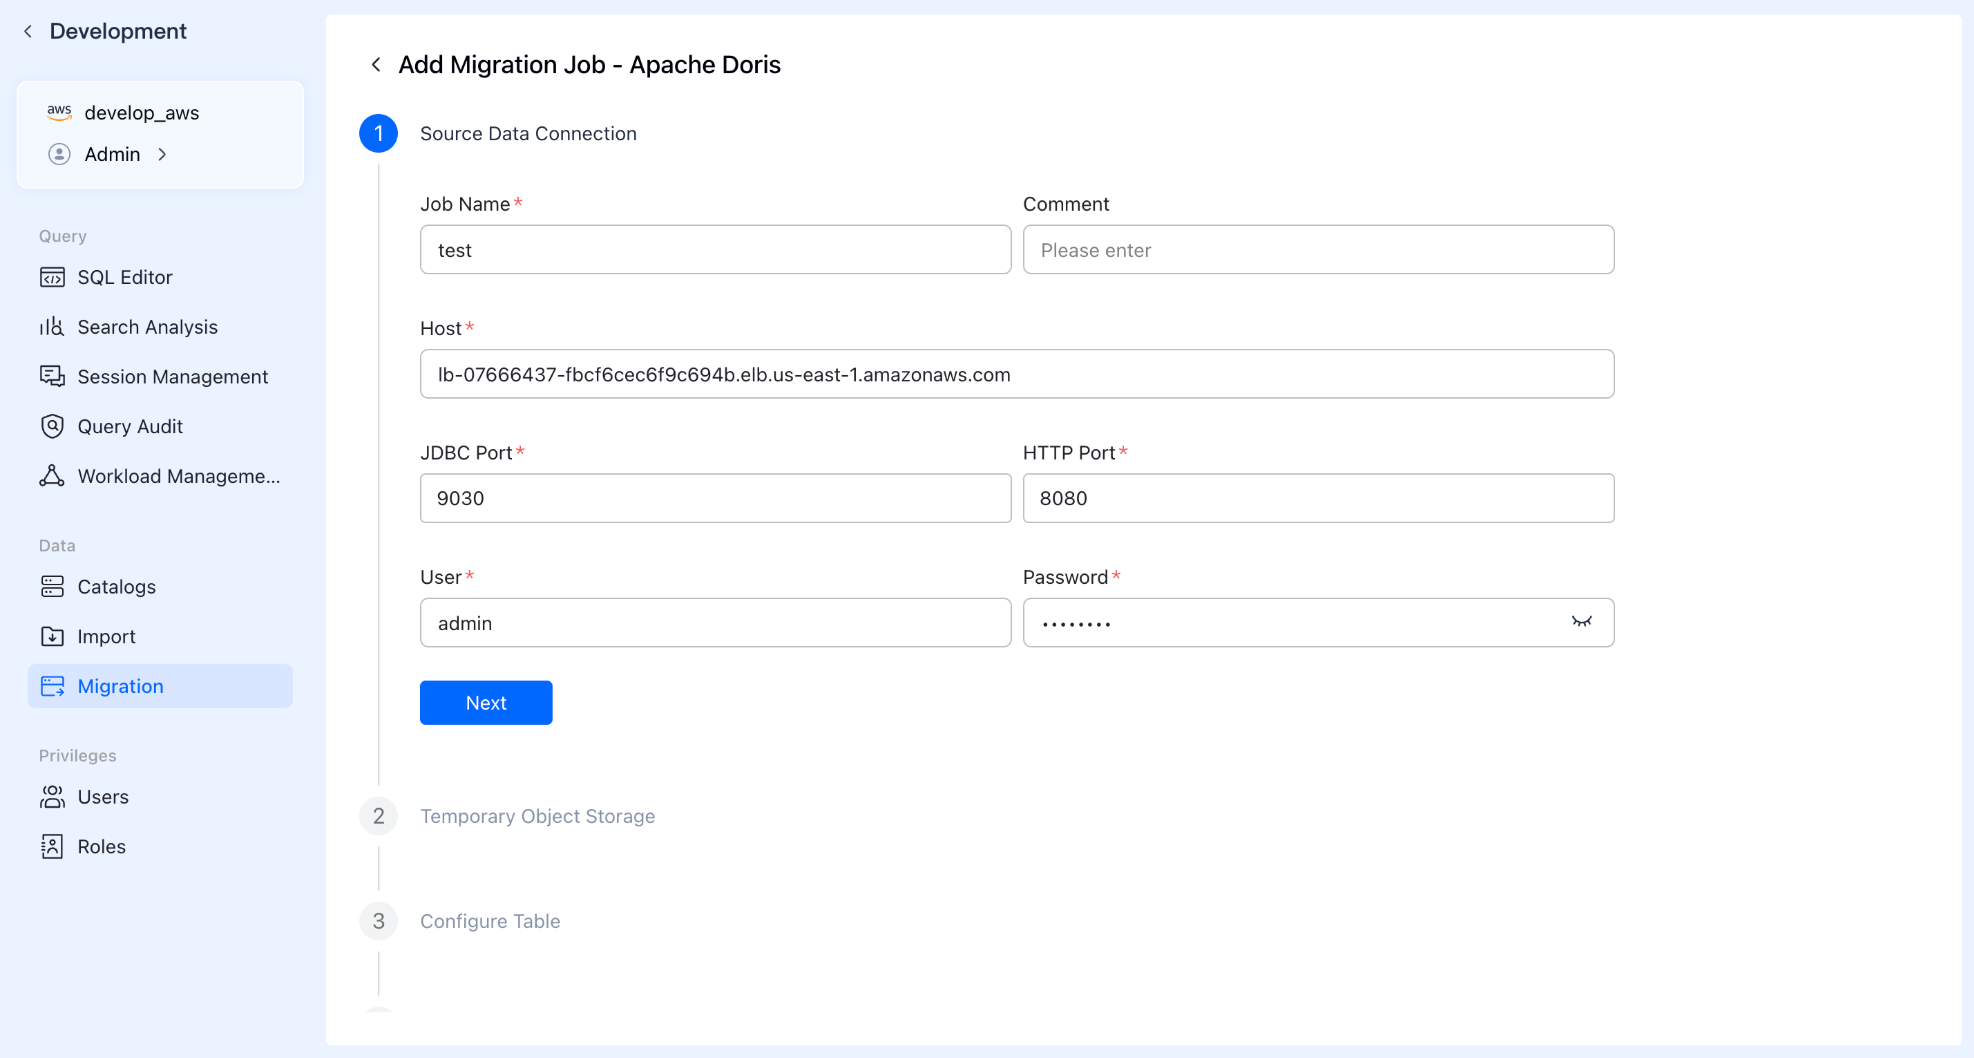
Step 1: Create Task & Connect Source
Enter the "Data Migration" module in the VeloDB Cloud console and click "Create Migration Task." Fill in the source cluster details (Address, JDBC/HTTP ports, Username, Password), and the system will automatically test connectivity to ensure a smooth path.
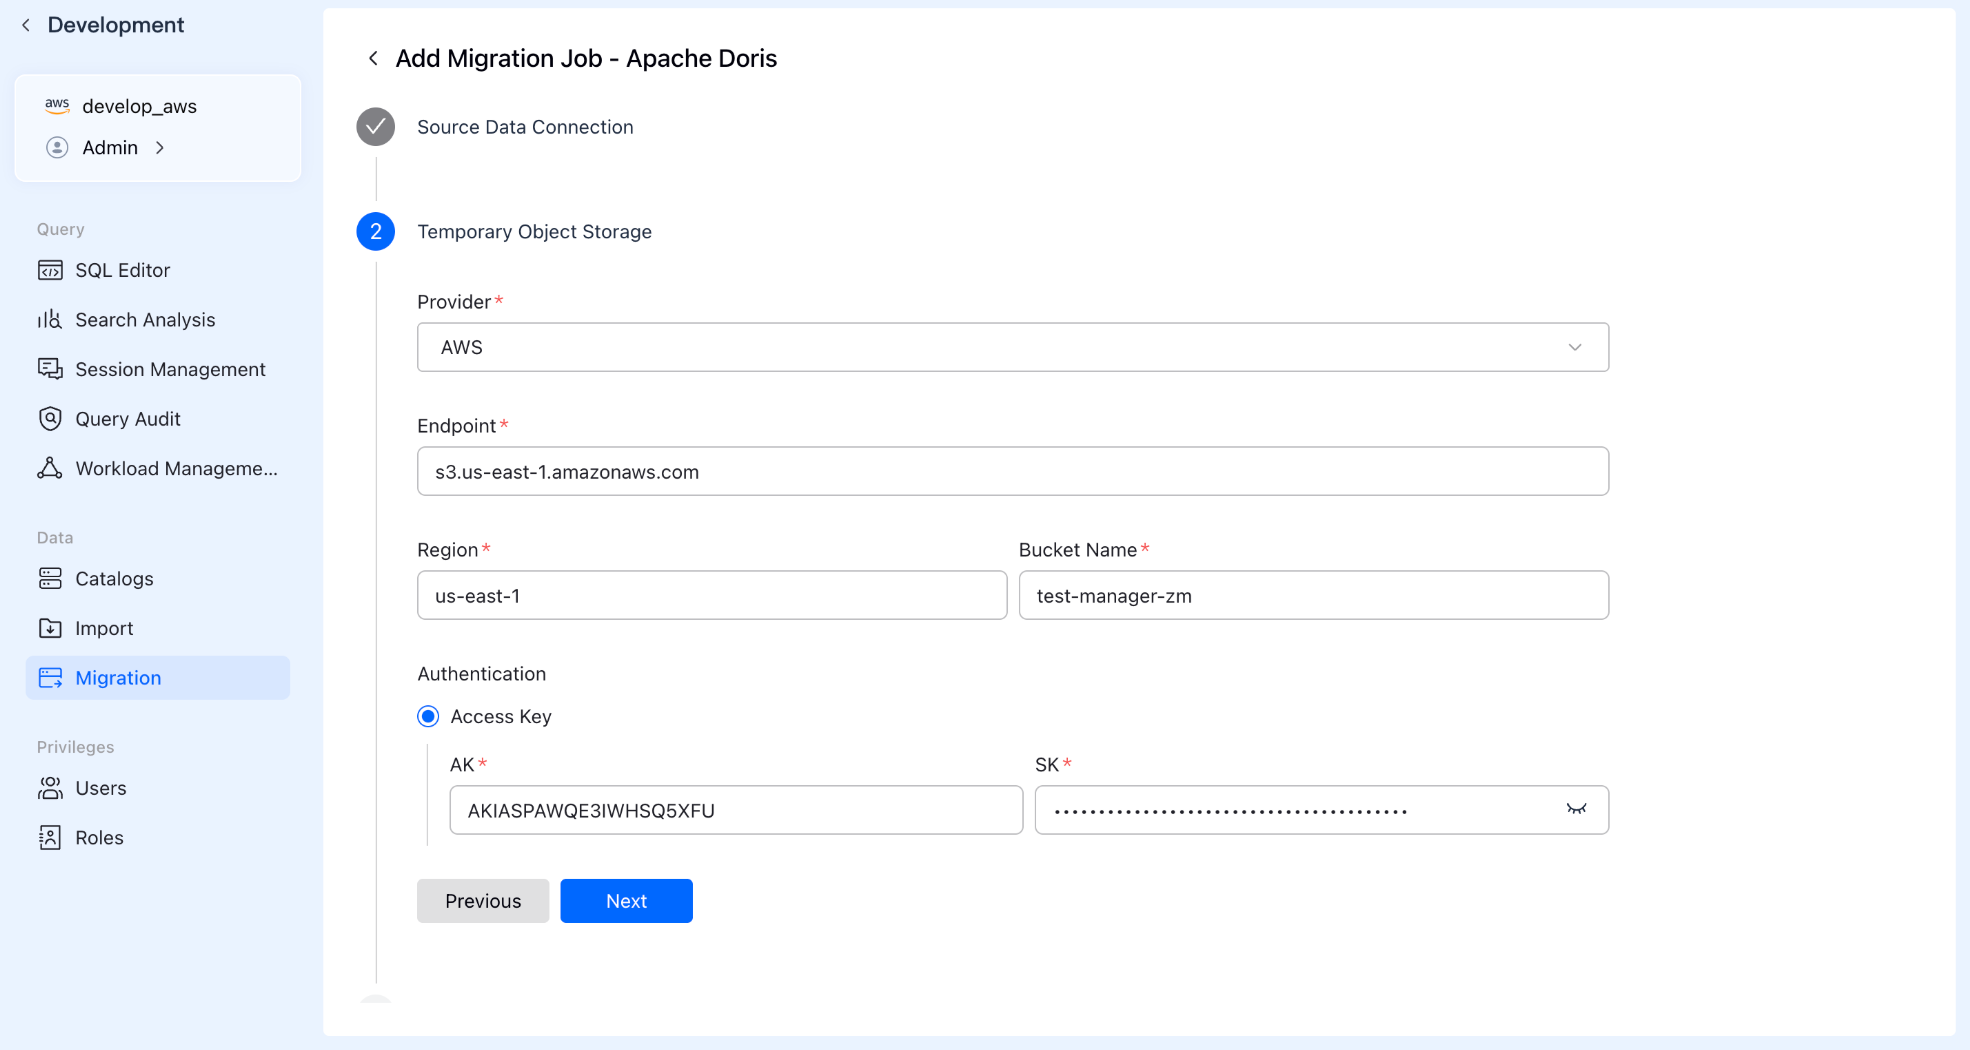
Step 2: Configure Staging Storage
Select your preferred Object Storage provider and enter the address and authorization details.
Tip: This acts as a "temporary resting place" for your data. It is automatically swept clean after the migration finishes, so no need to worry about garbage collection.
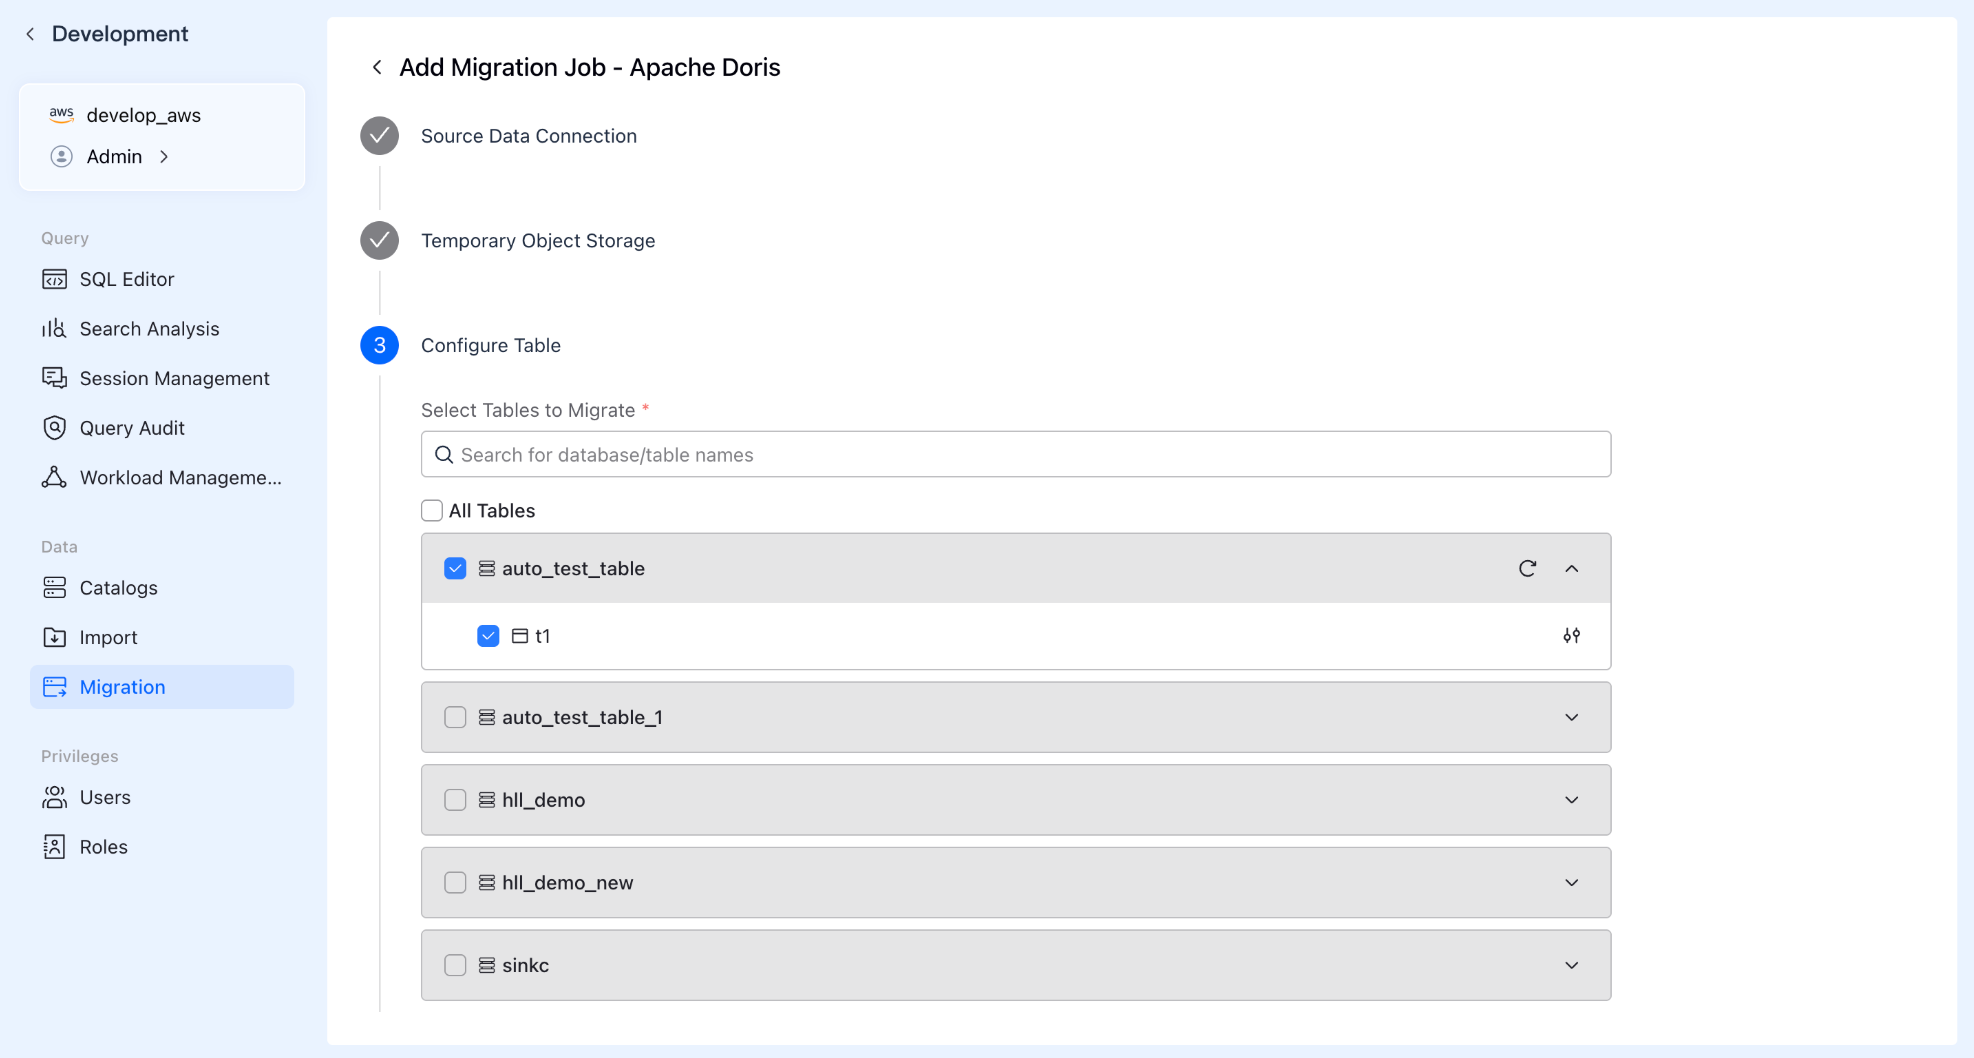
Step 3: Precise Data Selection
Don't need to migrate the entire database? No problem. The system supports batch selection or custom filtering of databases and tables. Just like shopping in a supermarket, you only pick the core assets you need to move to the cloud.
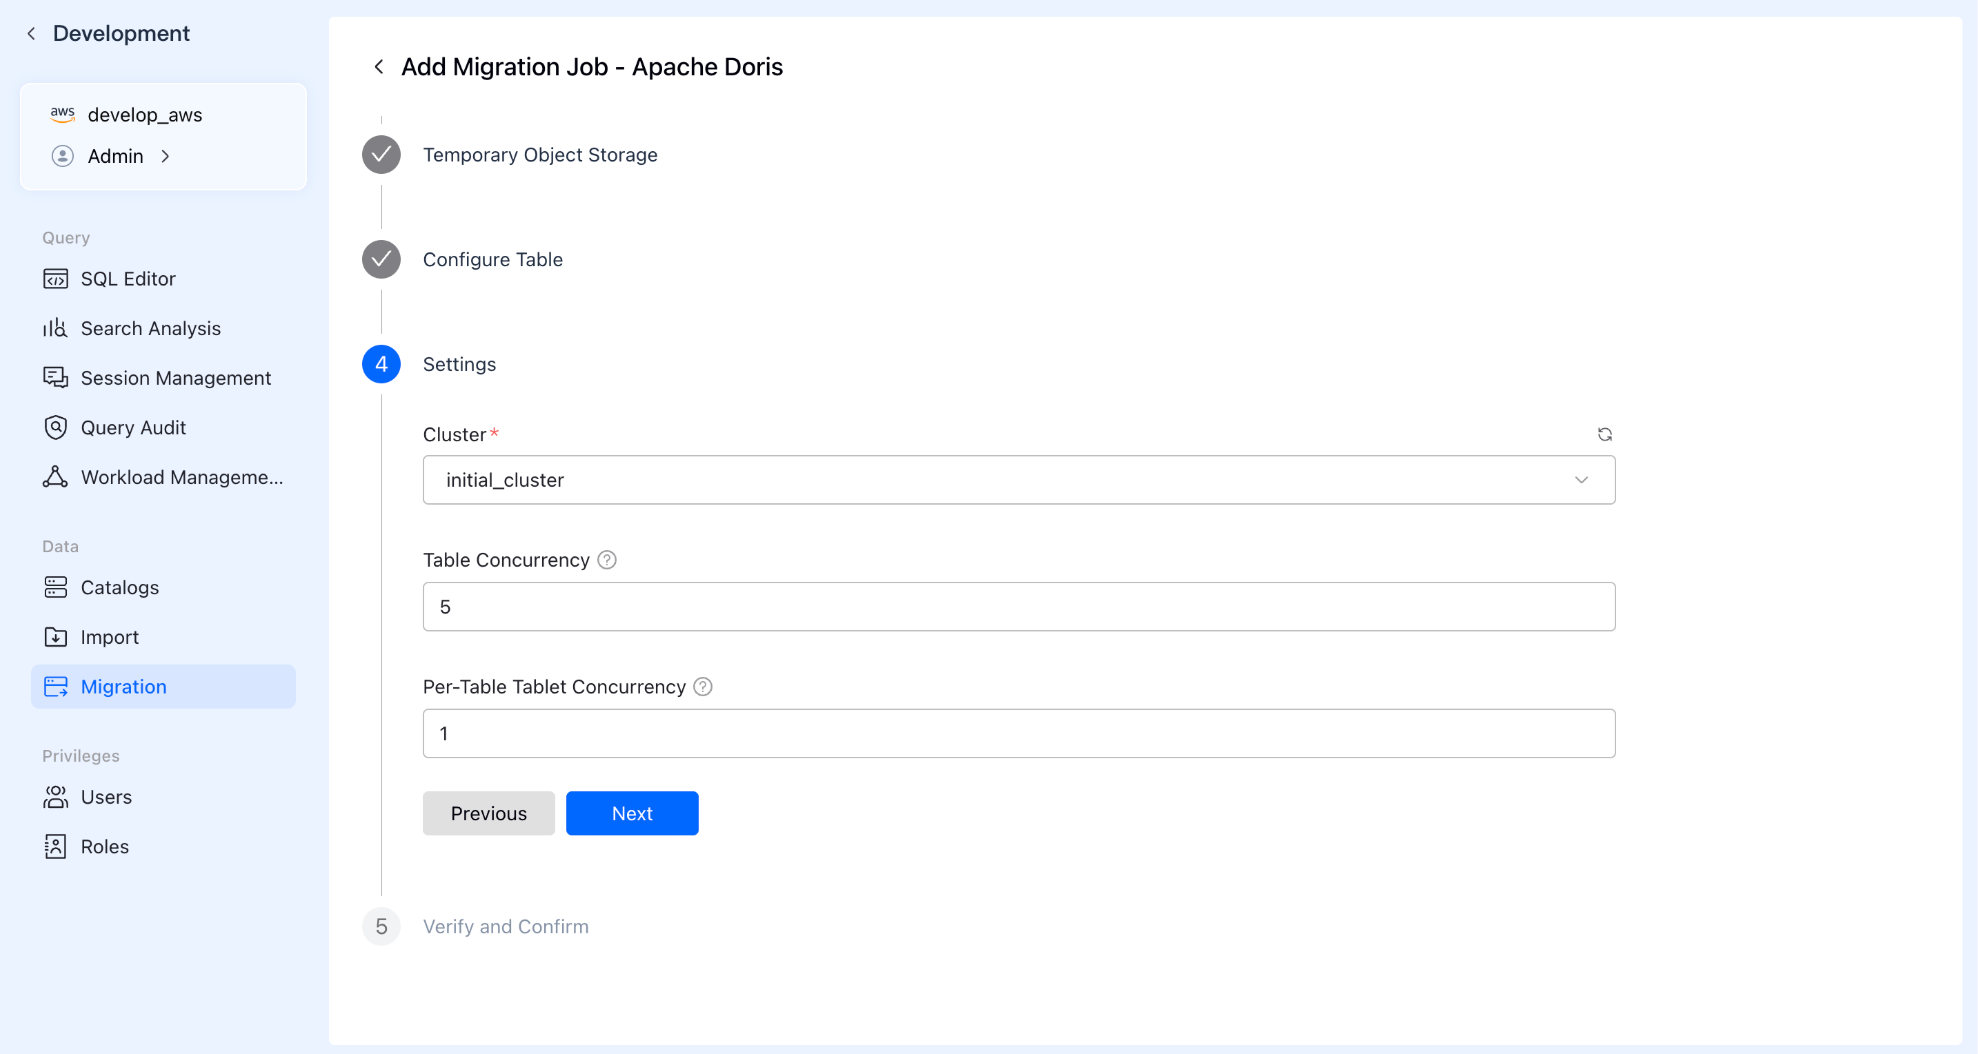
Step 4: Resources & Concurrency
Advanced configurations: specify the computing resource cluster used for the migration and set concurrency levels:
- Table Concurrency: How many tables to move simultaneously?
- Tablet Concurrency: How many parallel threads to open inside each table?
- Proper configuration here can significantly accelerate your migration speed.
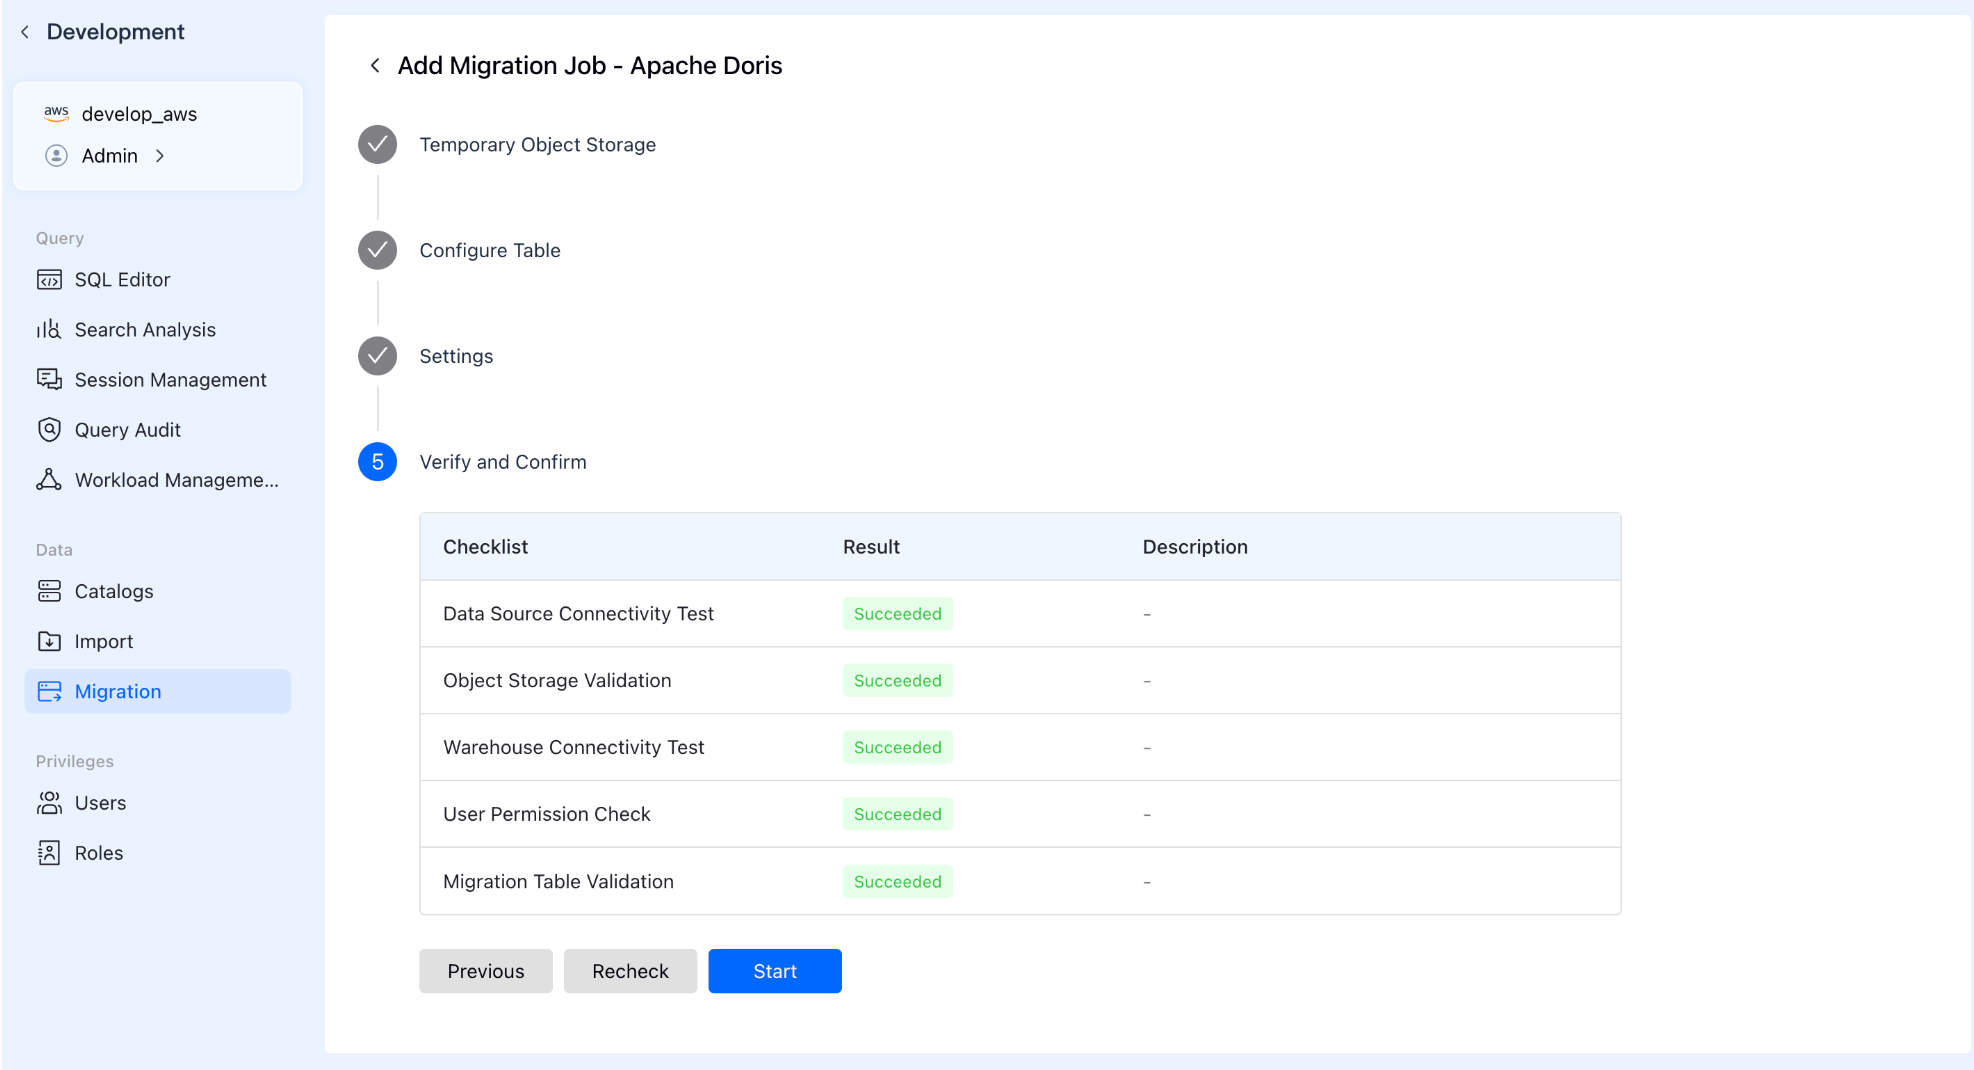
Step 5: Pre-check & Launch
The system automatically runs a pre-check to ensure all configurations are correct. Once passed, click start, and VeloDB Cloud handles the heavy lifting.
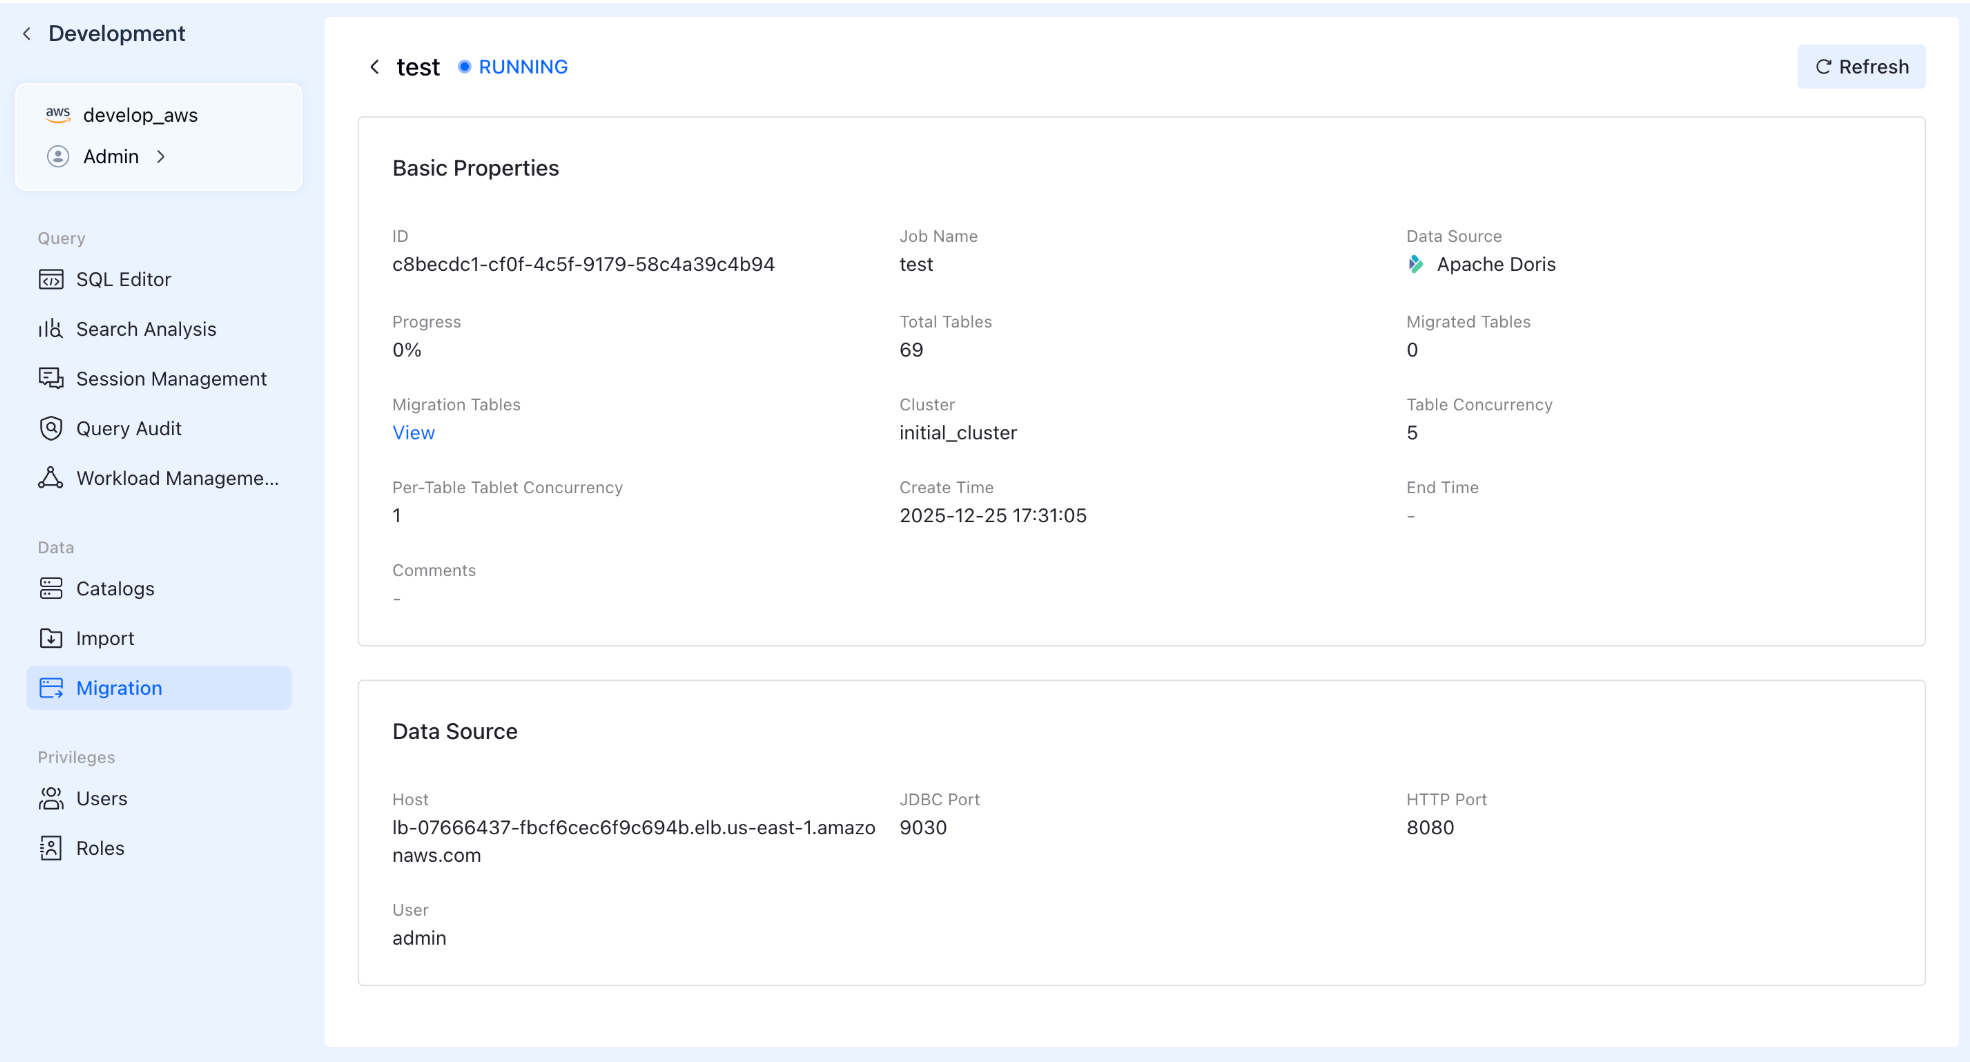
Total Control & Monitoring
Once the task starts, you can still view the status, creation time, and basic info of every migration task in the list. Click on a specific task to drill down into detailed progress reports.
Conclusion
Data migration is often the part that teams dread most about moving to a cloud-native data warehouse. VeloDB Cloud is built to make that step straightforward: select your sources, configure concurrency, monitor progress, and move on. If you’d like to explore how it works in practice, you can try VeloDB Cloud directly or dive deeper into the Documentation.